
Step 1 : Open/Select EC2 by Searching EC2 on AWS Search bar

Click on Launch Instance

Step 2 – Launch an Instance : Configure your instance with below details
| Sl.No | Stage/step | Details/configurations |
| (i) | Name | LP1_ubtuntu-apache-tomcat-server or <name> |
| (ii) | Application and OS Images | Ubuntu – 22.04-amd64-server-20230115 |
| (iii) | Instance type | t2.micro |
| (iv) | Key pair (login) | New → Name , type=RSA , Format=.pem |
| (v) | Network settings |  Allow SSH traffic from Anywhere Allow SSH traffic from Anywhere Allow HTTP traffic from the internet Allow HTTP traffic from the internet |
| (vi) | Configure storage | 8 GB – gp2 (keep as it is) |
| (vii) | Advanced details | Keep as it is |
| (viii) | Launch instance | Click on Launch instance on right side box |
Step 3 – Configure now :
| (i) | Name | LP1_ubtuntu-apache-tomcat-server or <name> |
| (ii) | Application and OS Images | Ubuntu – 22.04-amd64-server-20230115 |

| (iii) | Instance type | t2.micro |

| (iv) | Key pair (login) | Create Key pair |
| Keypair name : <your-key-name> | ||
| Key pair type : RSA | ||
| Private key format : choose pem | ||
| Click on Create key pair button |

Once you click on Create key pair button, key will be automatically downloaded, remember the downloaded location
| (v) | Network settings | Allow SSH traffic from AnywhereAllow HTTP traffic from the internet |

| (vi) | Configure storage | 8GB – gp2 (keep as it is) |

| (vii) | Advanced details | Keep as it is |
| (viii) | Summary | Click on Launch instance on right side box |
Once after clicking on Launch instance , we redirects to another page, in that page we can see Luanch status and Launch logs as success,
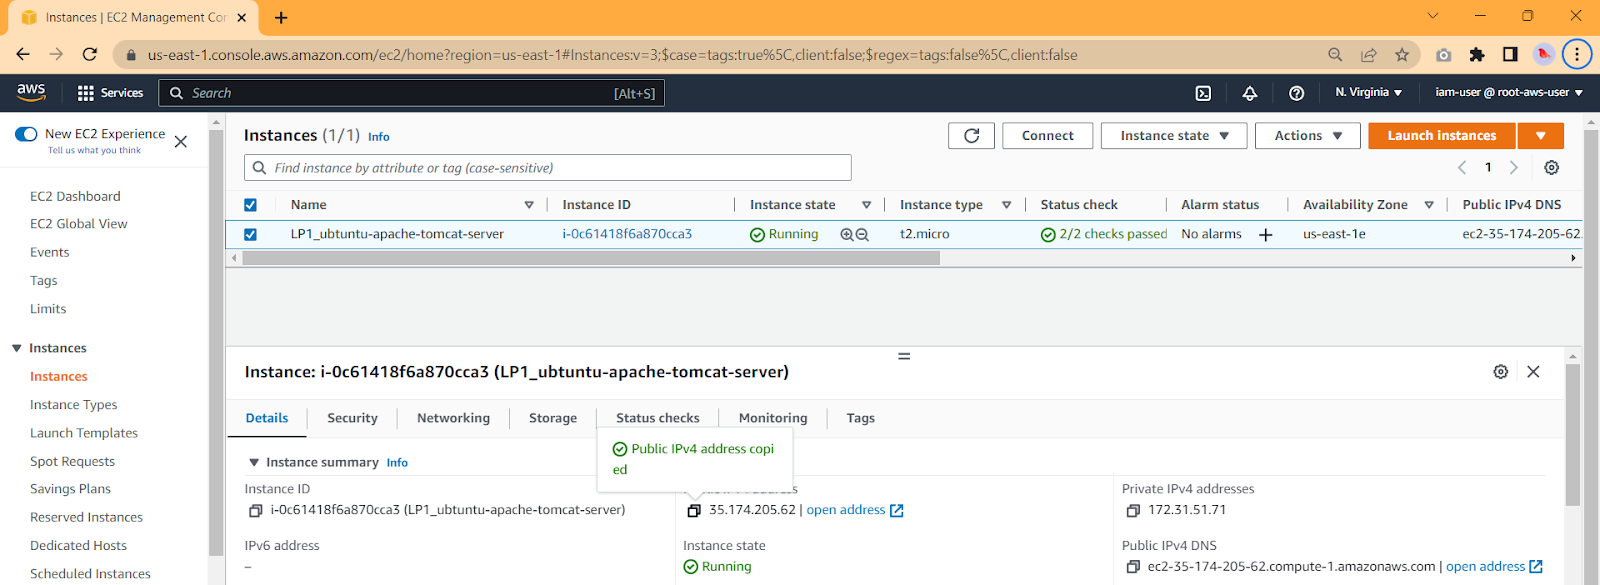
Next click on Instance ID in the brackets to connect with that instance

Step 3 – Connecting to Instance using .pem SSH key through SSH Terminal :
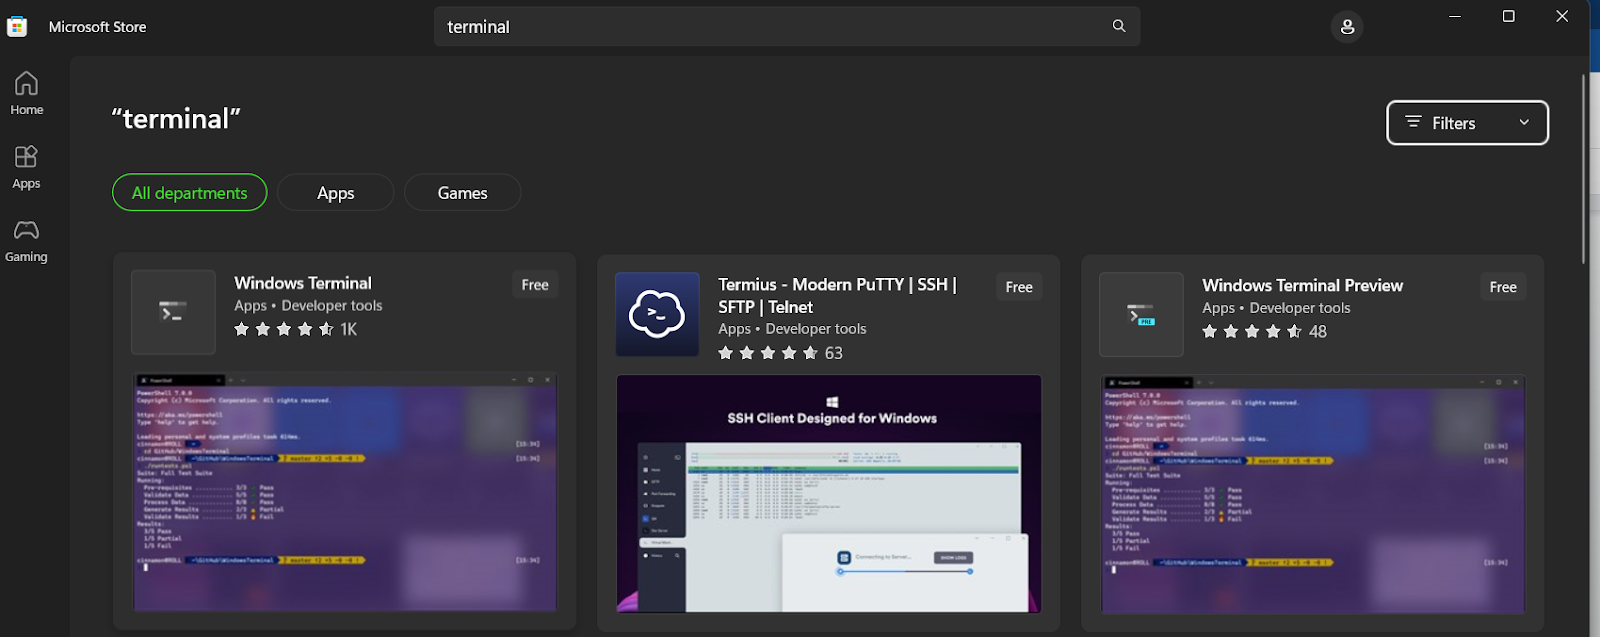
(Terminal : if you don’t have the terminal on windows , just to go to Microsoft store(which is preinstalled on windows 10 and 11, Search for Windows Terminal and install the Windows Terminal)
Wait until the checks completed , below screenshot shows your , instance state and status checks with pending status and Wait up to 2-5 minutes, keep refreshing until you get the responses like below

Next, Select the instance by selecting tick at its left side and click on connect button on top

We can connect to EC2 instance with below option
-
- EC2 Instance Connect
-
- Session Manager
-
- SSH client
-
- EC2 serial console
But in among them we use SSH client option to connect
Choose SSH, copy the Example: command

Check , which location the pem key is downloaded in file explorer

Open Terminal by searching on windows

Run the below commands:
| Moving to downloads directory | cd downloads | |
| Paste the Example command here | ssh -i “LP1_ubtuntu-apache-tomcat-server-keypair.pem” ubuntu@ec2-35-174-205-62.compute-1.amazonaws.com | |
| Press Enter |

Now, we are connected to ubuntu EC2.
| step -4 | Installing Tomcat 10 on Ubuntu 22.04 LTS |
| Steps | Topic | Commands used |
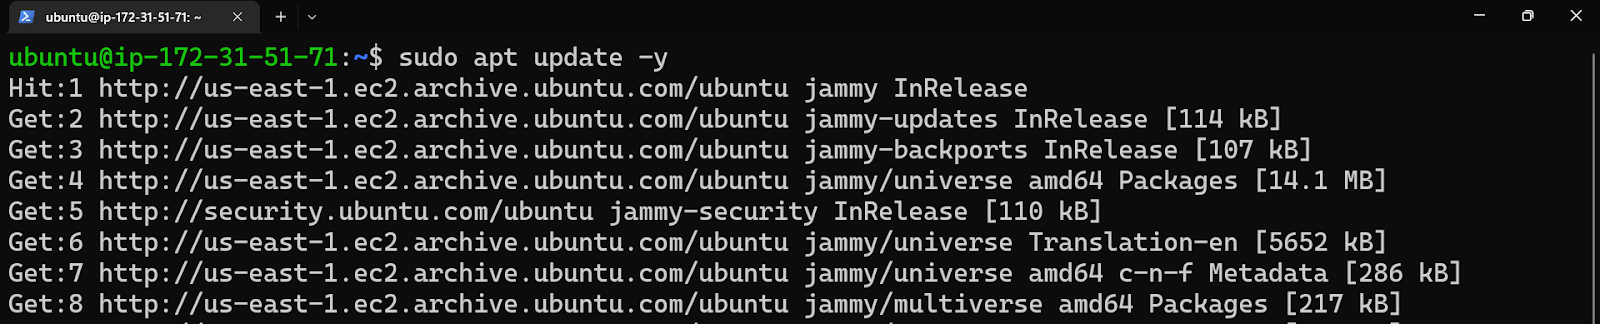
| Step 1 | Updating the ubuntu instance | sudo apt update -y |
| Step 2 | Installing the Java | sudo apt install openjdk-11-jdk |
| Step 3 | Verify java installation | java –version |
| Step 4 | Creating a system user | sudo useradd -m -U -d /opt/tomcat -s /bin/false tomcat |
| Step 5 | Download Tomcat v 10.1.1 | VER=”10.1.1″ |
| wget https://archive.apache.org/dist/tomcat/tomcat-10/v${VER}/bin/apache-tomcat-${VER}.tar.gz | ||
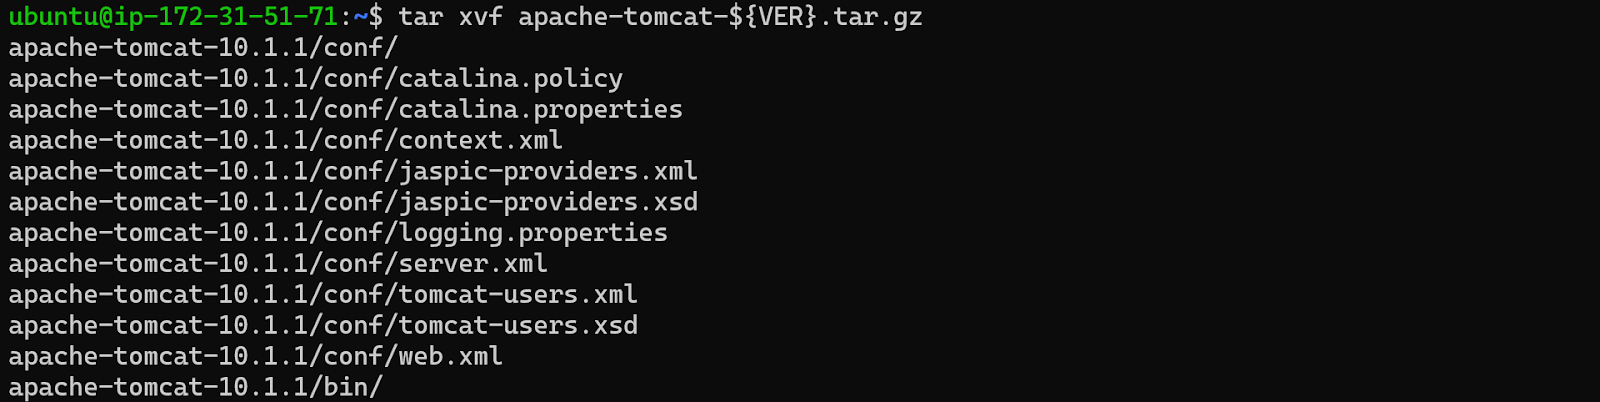
| Step 6 | Extract tar archive and install Tomcat | tar xvf apache-tomcat-${VER}.tar.gz |
| Step 7 | Move extracted files to /usr | sudo mv apache-tomcat-${VER} /usr/share/apache-tomcat |
| Step 9 | Adding permission | sudo chown -R tomcat /usr/share/apache-tomcat |
| Step 2 | Updating the ubuntu instance |
 command command |
sudo apt update -y |
Terminal Response :

| Step 2 | Installing the Java |
| command |
sudo apt install openjdk-11-jdk |
Press Y if it asks you for permissions
Terminal Response :


| Step 3 | Verify java installation |
| command |
java –version |
Terminal Response :

| Step 4 | Mentioning version and Downloading Tomcat |
| command |
VER=”10.1.1″ |
| command |
wget https://archive.apache.org/dist/tomcat/tomcat-10/v${VER}/bin/apache-tomcat-${VER}.tar.gz |
Terminal Response :

| Step 5 | Extracting the file |
| command |
tar xvf apache-tomcat-${VER}.tar.gz |
Terminal Response :
| Step 6 | Moving the extracted for to a directory |
| command |
sudo mv apache-tomcat-${VER} /usr/share/apache-tomcat |
| command |
verifying files are moved or not by using this below command : ls /usr/share/apache-tomcat |
Terminal Response :

Files are moved , we got list of files in the directory
| Step 7 | Creating/adding tomcat system user |
| command |
sudo useradd -M -d /usr/share/apache-tomcat tomcat |
| Adding permission with his directory to the tomcat user | |
| command |
sudo chown -R tomcat /usr/share/apache-tomcat |
| Verifying the changes (by long listing it) | |
| command |
ll /usr/share | grep apache-tomcat |
Terminal Response : Successfully created user, added tomcat as owner to /usr/share/apache-tomcat
Directory and we can see tomcat in the list as owner

To Read/Get More info by visiting this web page :
  |
https://sagar5.in/linux/linux-listing-directory-explanation/ |
Vi Editor :
On Next steps we use VI Editor, to edit the file on Terminals, it is a file editor, we need to use some commands to edit the files .
To Read/Get More info by visiting this web page :
|
https://sagar5.in/linux/linux-vi-editor/ |
But right now we need basic information so just try to follow this
| Note | After running vim commands, file opens , to edit the file Press I andTo save the file first press the ESC button , next type :wq! , press Enter |
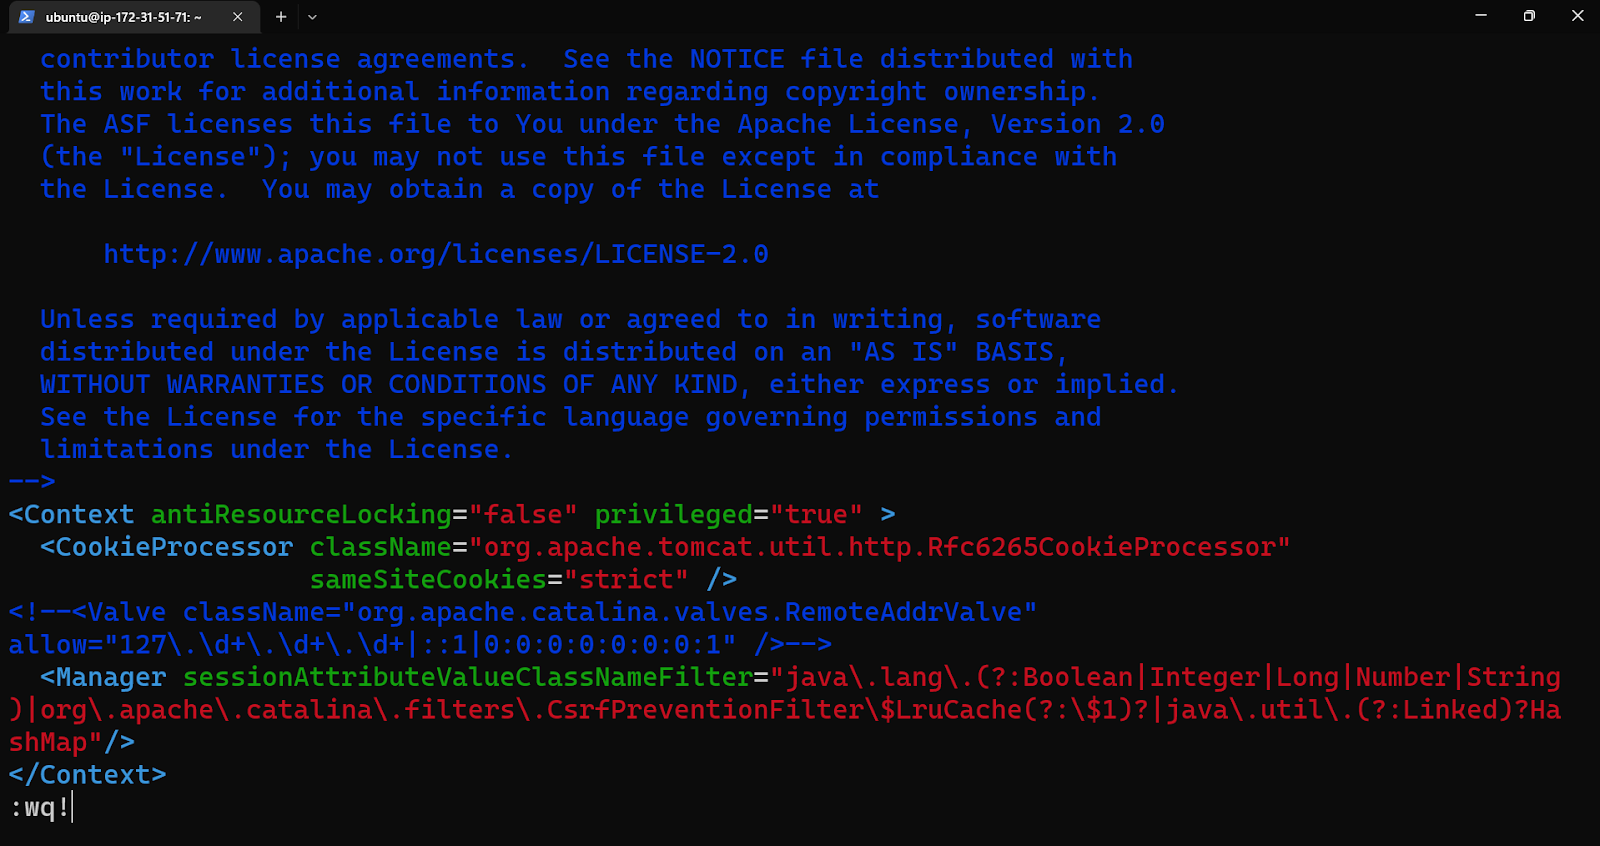
| Step 8 | Making public accessible by commenting Remoteaddressvalue for manager |
| command |
sudo vim /usr/share/apache-tomcat/webapps/manager/META-INF/context.xml |
| Comment this line | <!–<Valve className=”org.apache.catalina.valves.RemoteAddrValve” allow=”127\.\d+\.\d+\.\d+|::1|0:0:0:0:0:0:0:1″ />–> |
Terminal Response :
| Step 9 | Making public accessible by commenting Remoteaddressvalue for host-manager |
| command |
sudo vim /usr/share/apache-tomcat/webapps/host-manager/META-INF/context.xml |
| Comment this line | <!–<Valve className=”org.apache.catalina.valves.RemoteAddrValve” allow=”127\.\d+\.\d+\.\d+|::1|0:0:0:0:0:0:0:1″ />–> |
Terminal Response :

| Step 10 | Adding Tomcat username and password by editing tomcat-users.xml file |
| command |
sudo vim /usr/share/apache-tomcat/conf/tomcat-users.xml |
| Add this lines before</tomcat-users> section | <!– manager section user role –><role rolename=”manager-gui” /><user username=”AdminManager” password=”AdminManager@2023#” roles=”manager-gui” /><!– admin section user role –><role rolename=”admin-gui” /><user username=”AdminUser” password=”AdminUser@2023#” roles=”manager-gui,admin-gui” /> |
| Note | After running vim commands, file opens , to edit the file Press I andTo save the file first press the ESC button , next type :wq! , press Enter |
Terminal Response :

| Step 10 | Creating systemd service file |
| command |
sudo vim /etc/systemd/system/tomcat.service |
| Copy paste the code to the file | [Unit]Description=TomcatAfter=syslog.target network.target[Service]Type=forkingUser=tomcatGroup=tomcatEnvironment=JAVA_HOME=/usr/lib/jvm/java-11-openjdk-amd64Environment=’JAVA_OPTS=-Djava.awt.headless=true’Environment=CATALINA_HOME=/usr/share/apache-tomcatEnvironment=CATALINA_BASE=/usr/share/apache-tomcatEnvironment=CATALINA_PID=/usr/share/apache-tomcat/temp/tomcat.pidExecStart=/usr/share/apache-tomcat/bin/catalina.sh startExecStop=/usr/share/apache-tomcat/bin/catalina.sh stop[Install]WantedBy=multi-user.target |
| Note | After running vim commands, file opens , to edit the file Press I andTo save the file first press the ESC button , next type :wq! , press Enter |
Terminal Response :

When after running the above command , vi editor opens paste the above content here

| Step 11 | Reload systemd daemon |
| command |
sudo systemctl daemon-reload |
| Step 12 | start the tomcat service |
| command |
sudo systemctl restart tomcat |
| Step 13 | Enable tomcat to start at system boot |
| command |
sudo systemctl enable tomcat |
Terminal Response :

| Step 14 | Check the status of tomcat service |
| command |
sudo systemctl status tomcat |
Terminal Response :

| Step 14 | Verifying the port 8080 |
| command |
sudo ss -tunelp | grep 8080 |
Terminal Response :

| Step 14 | Copy the public IP of EC2 by selecting it |
| Step 15 | Open the public ip at browser by adding port 8080 |
Before opening it
Add a entry in Instance security group with
(i) Select instance, go security tab at bottom side and Click on Security group
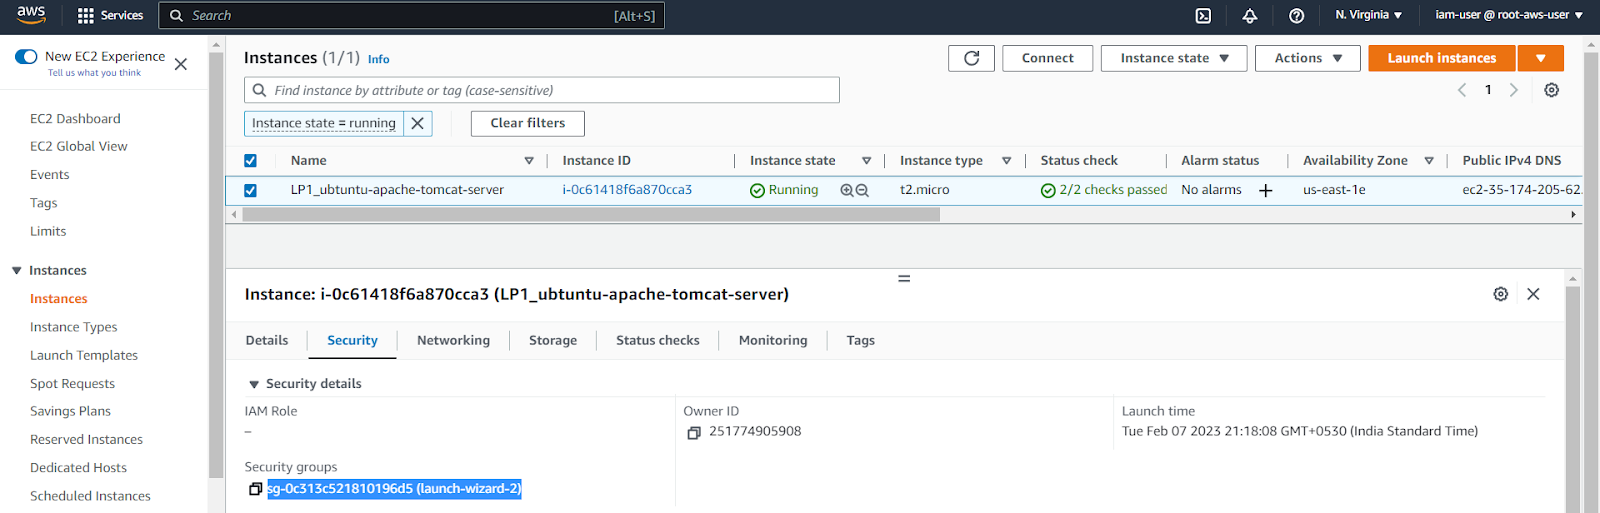
(ii) Click on Edit inbound rules

(iii) Add Rule :
Type : Custom TCP , Port range : 8080 , Source : Anywhere – IPv4 , Next click on Save rules

Step 5: Login & Verify
Now open the Public ip with port : Now it is working

Now we can login in to Tomcat using tomcat-users.xml credentials
Admin user:
Username : AdminUser
&
Password : AdminUser@2023#
Manager user
Username : AdminManager
&
Password : AdminManager@2023#
Click on Manager App : Login with credentials of Manager


Now we can see Manager Admin panel
